Hive Keychain Blog Banner

Hive Keychain

DIY HUB with a very easy and tender craft (Eng-Esp)

By yennysferm71

Diy Hub Souvenir.png

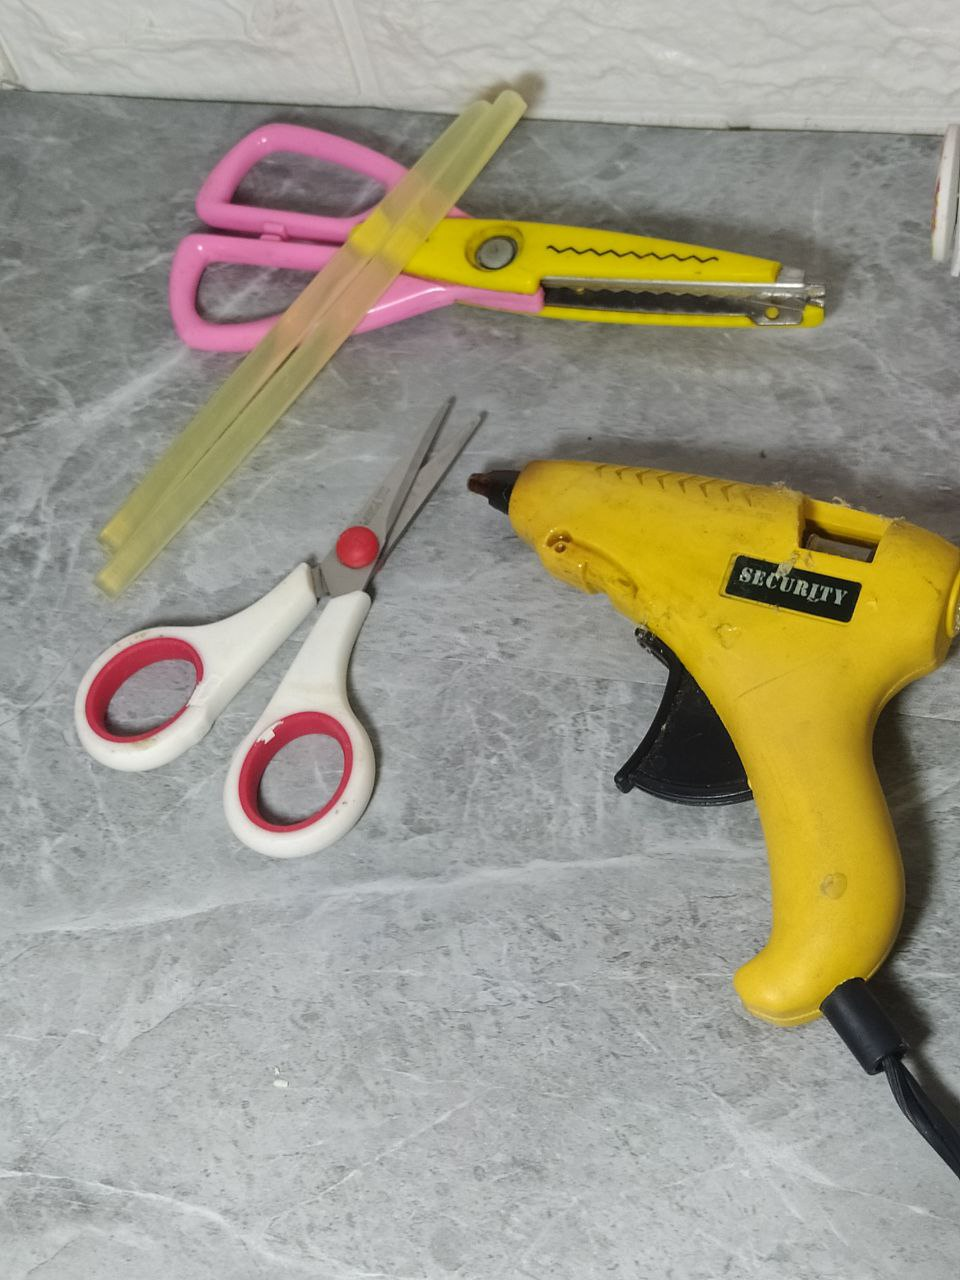
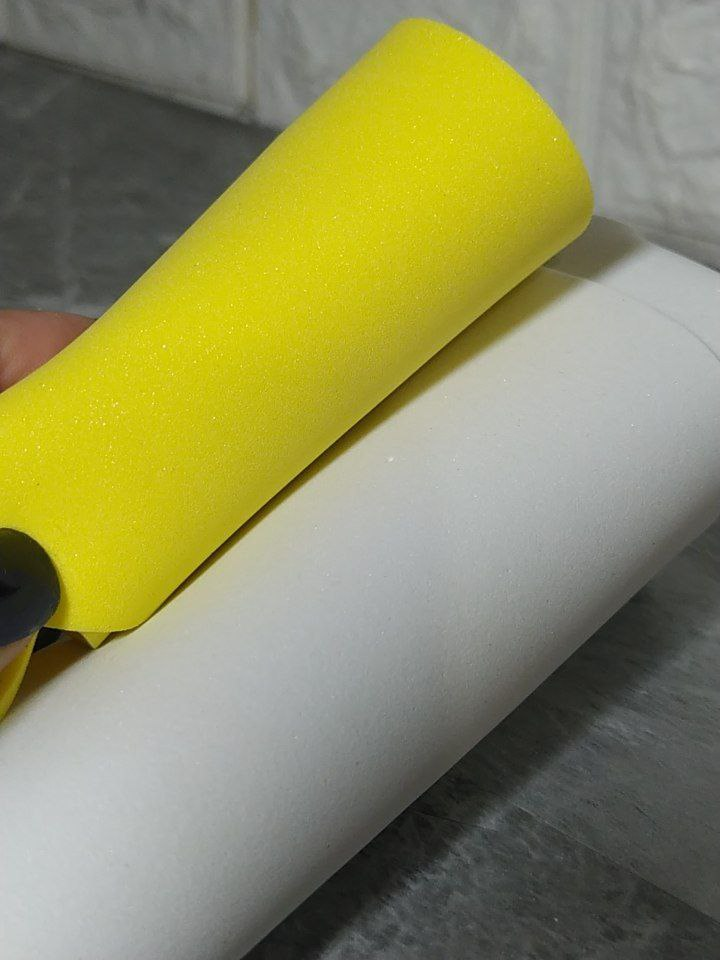
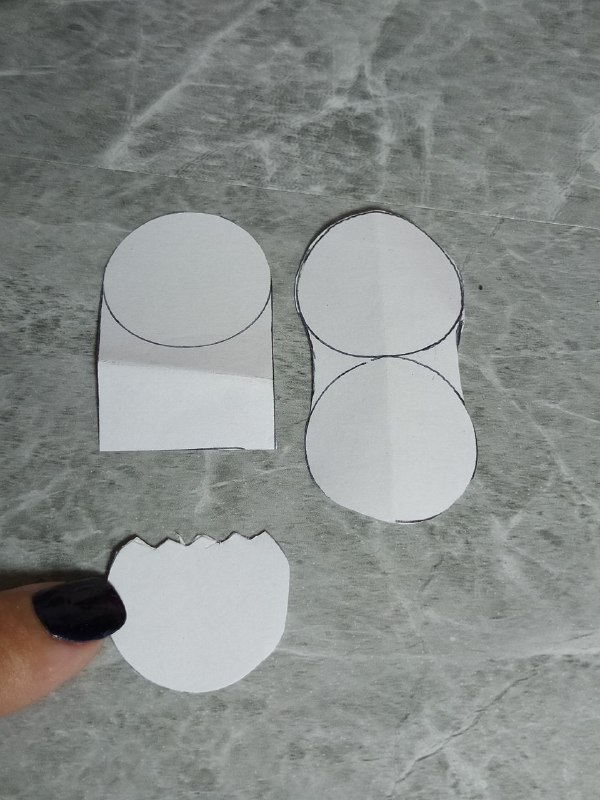
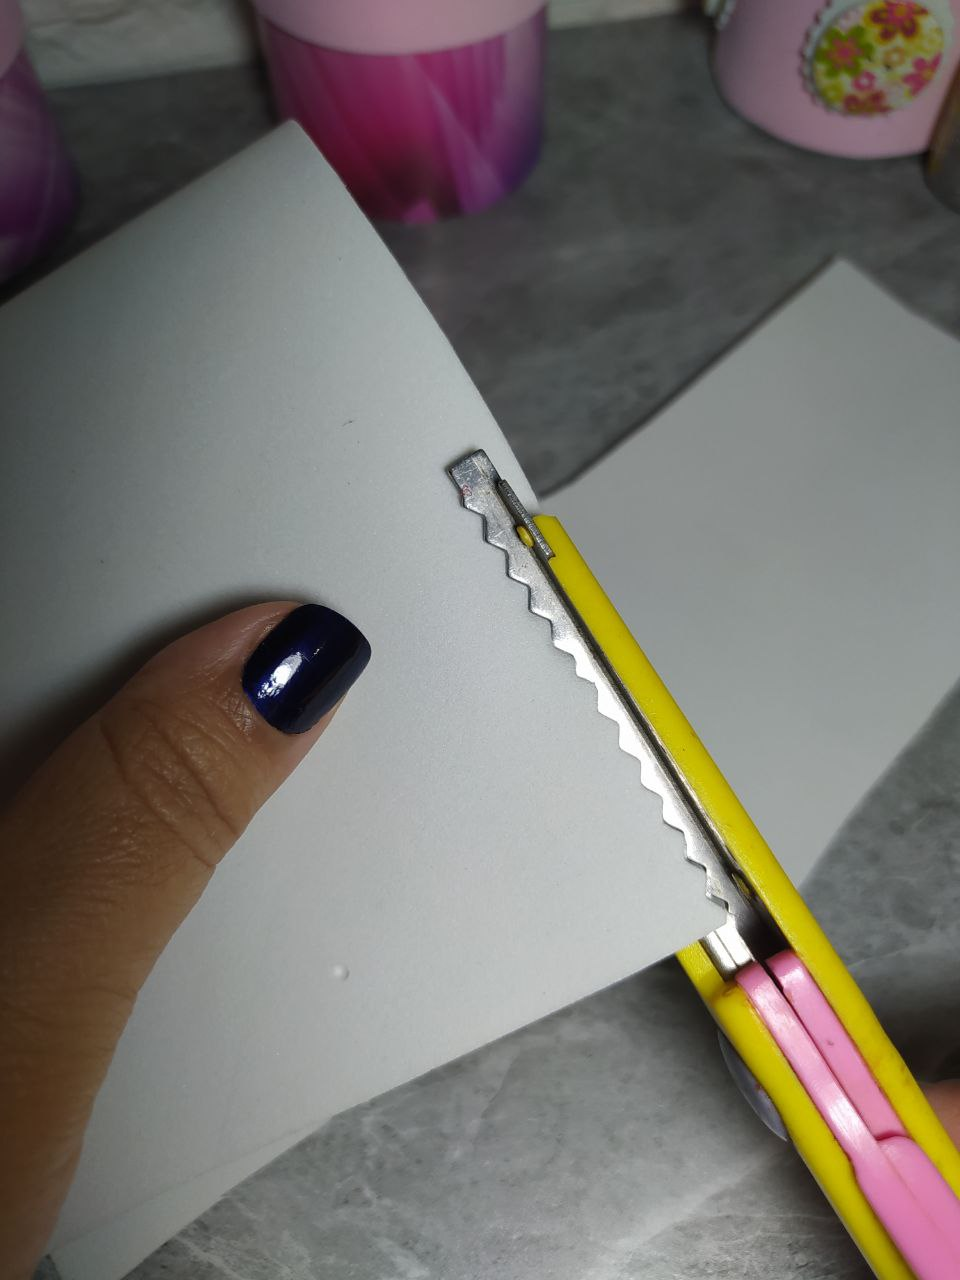
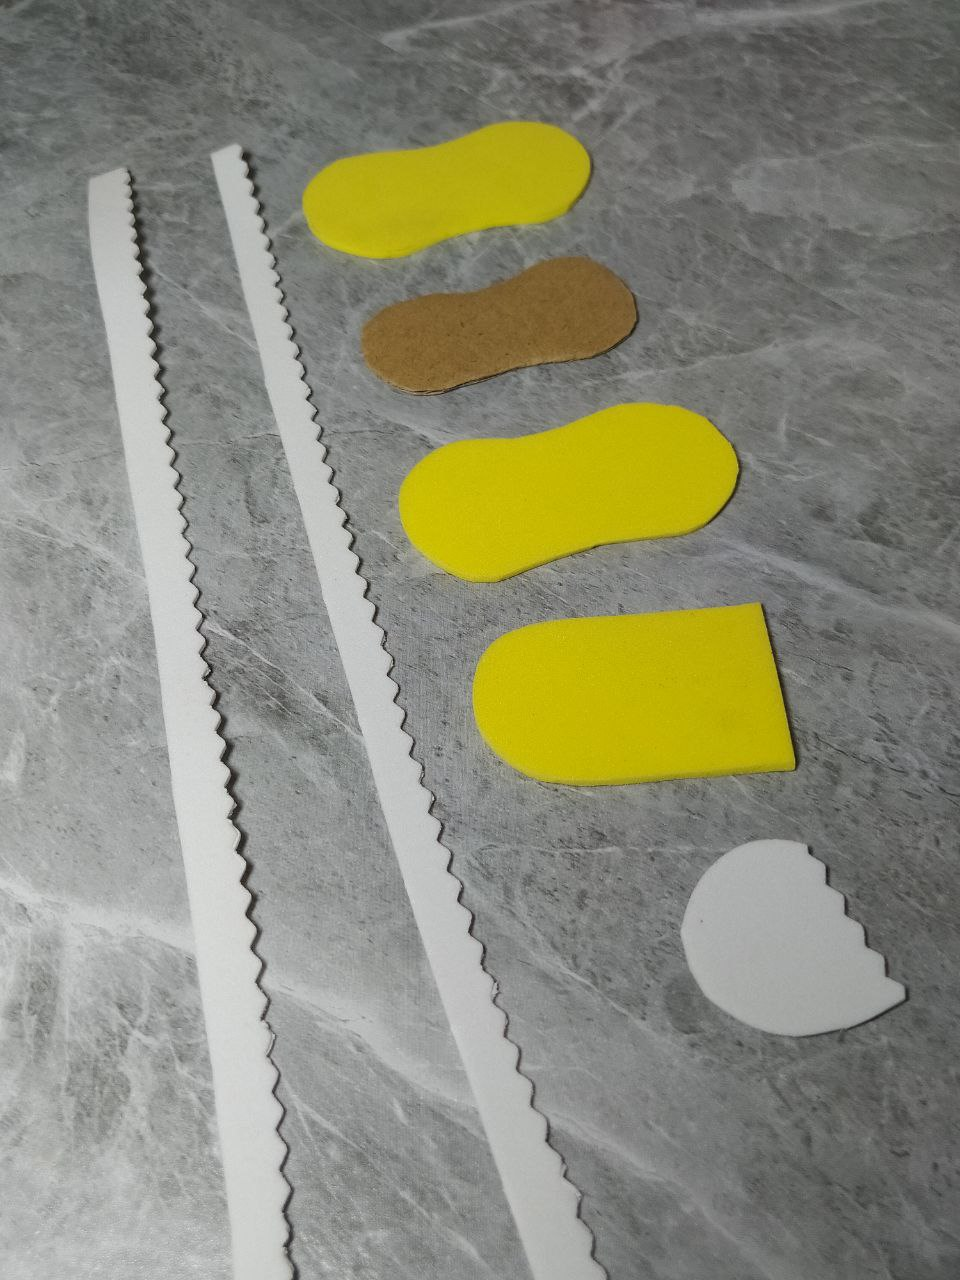
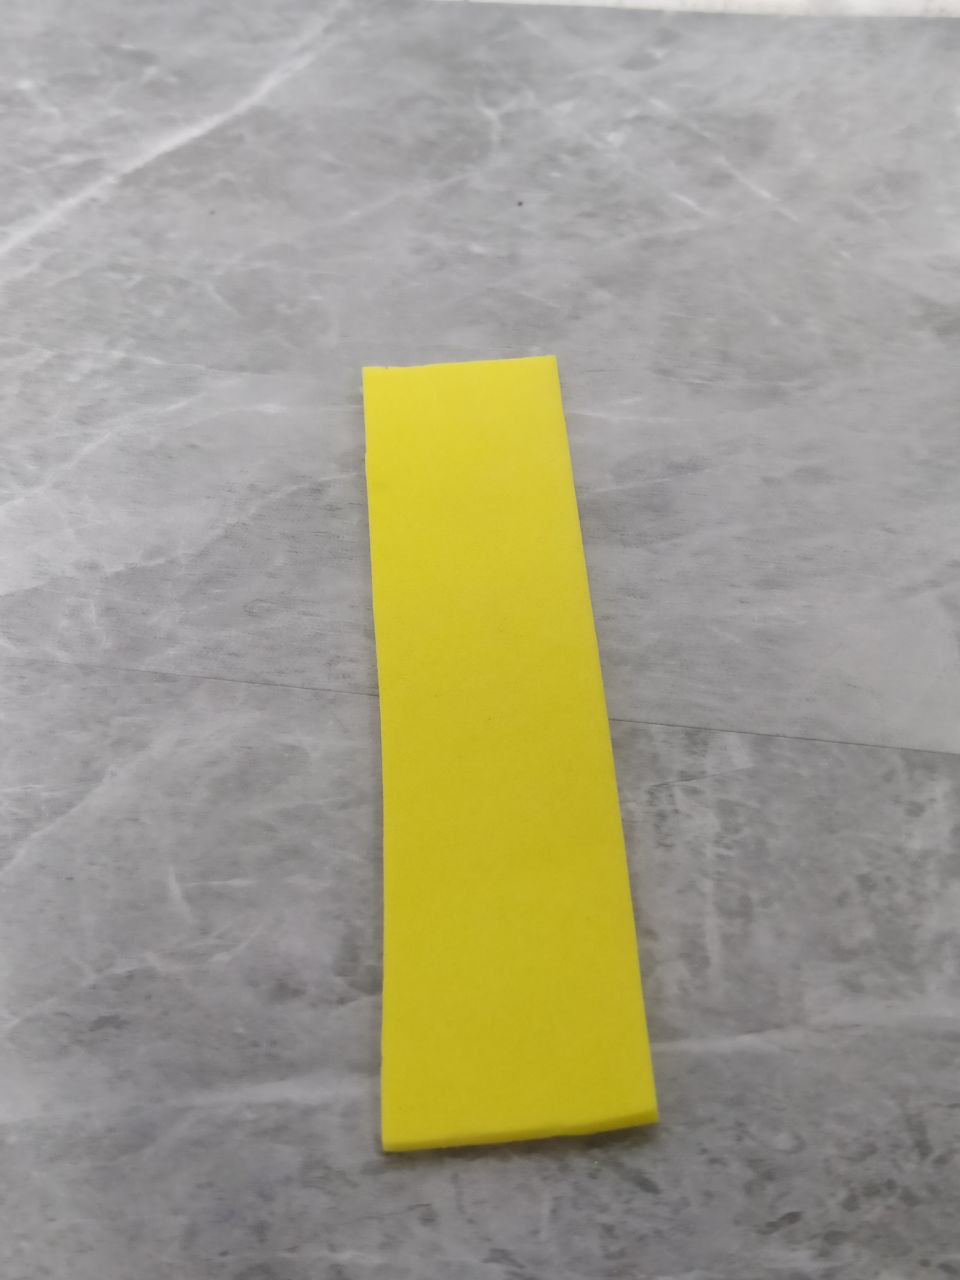
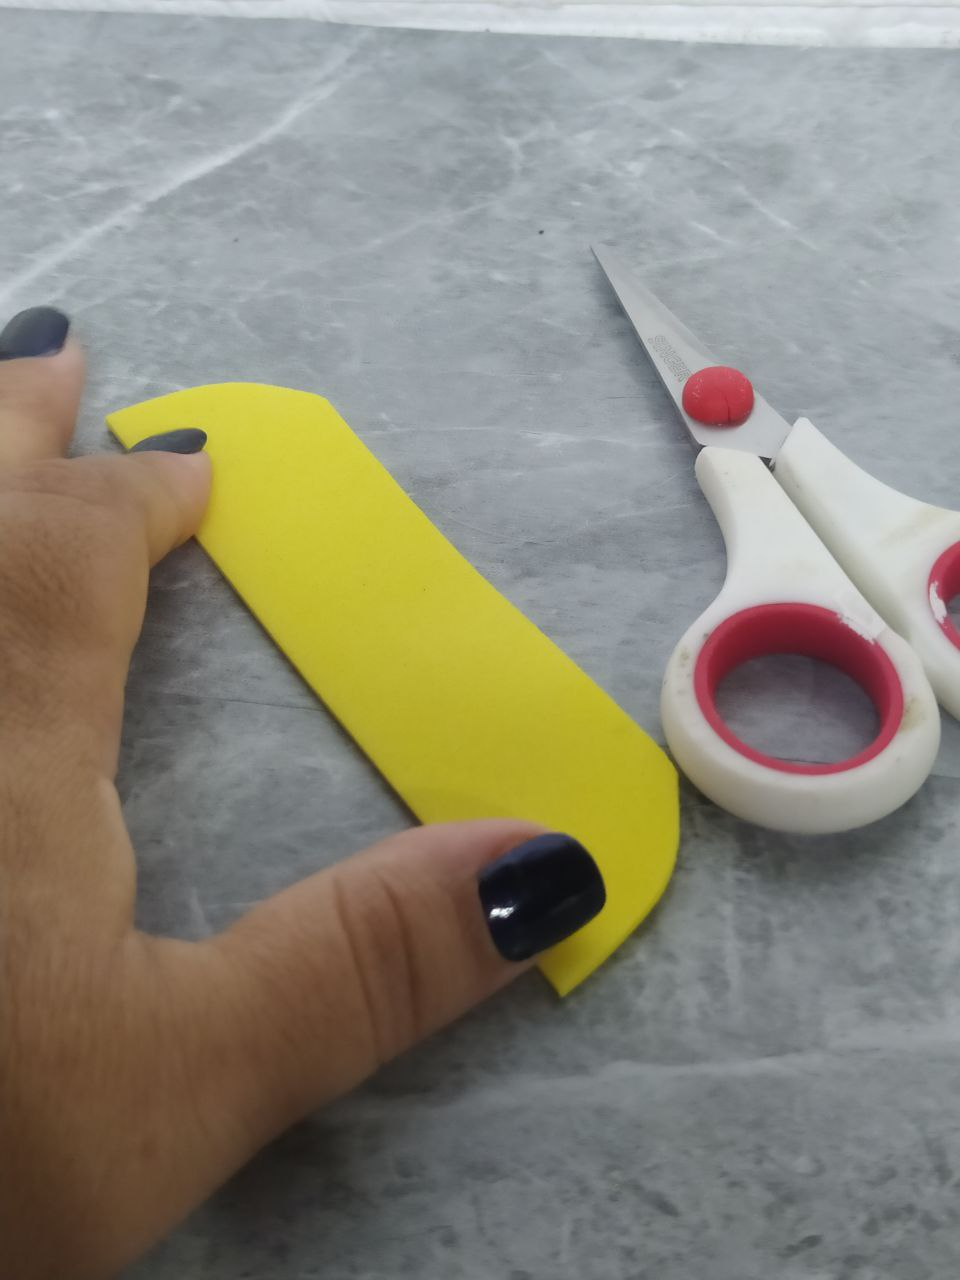
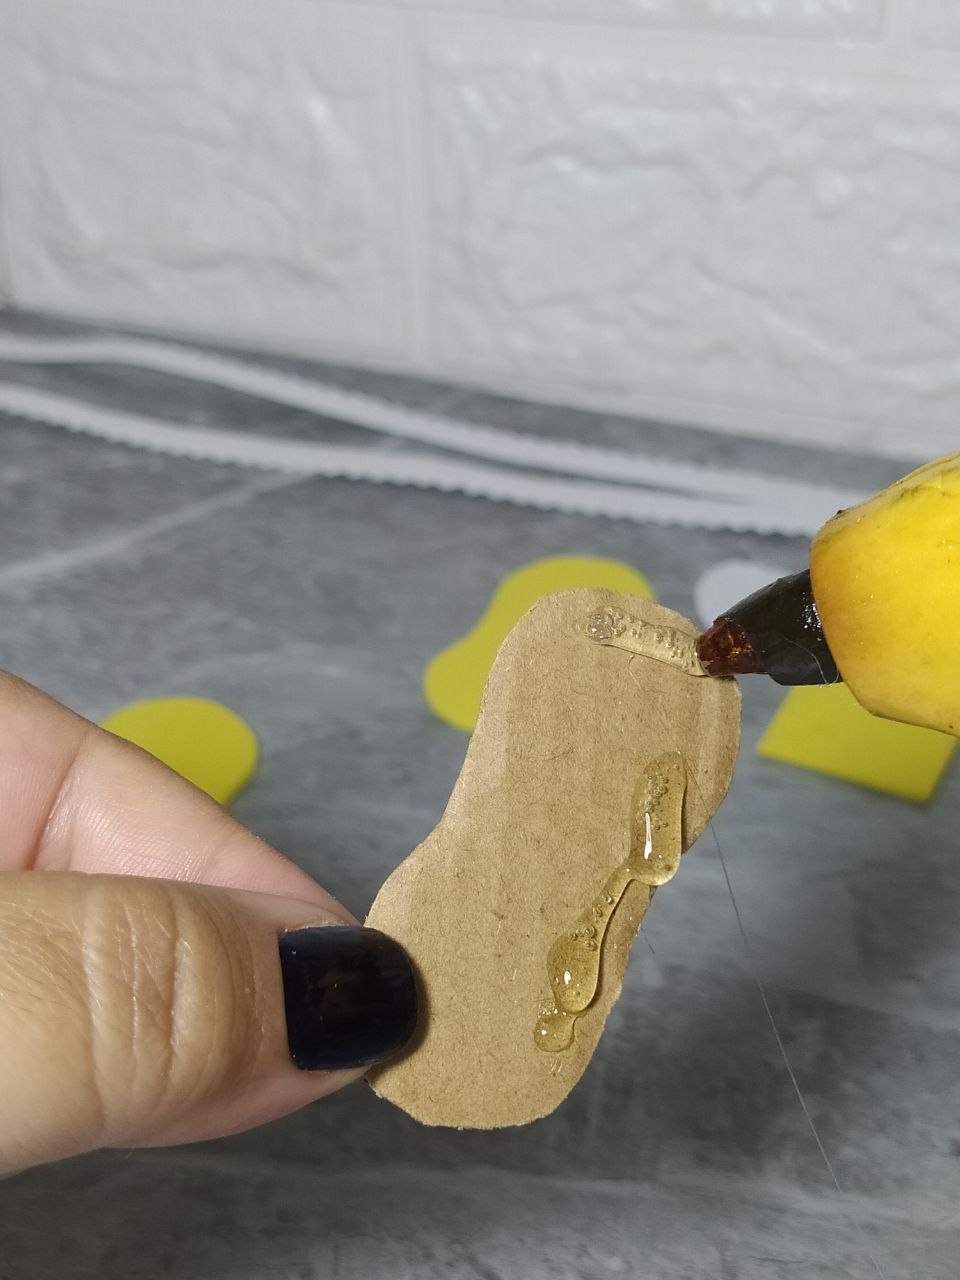
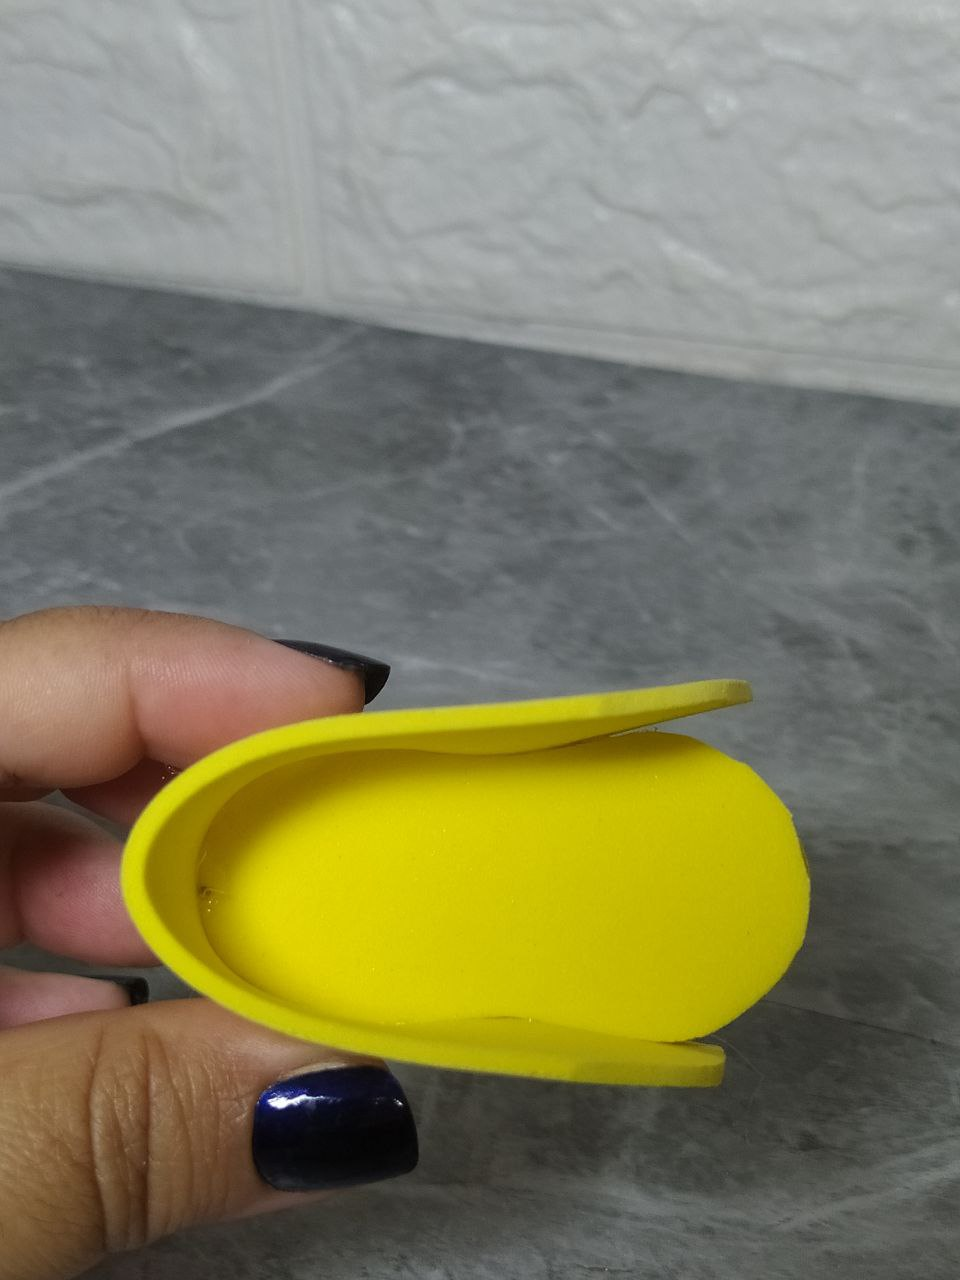
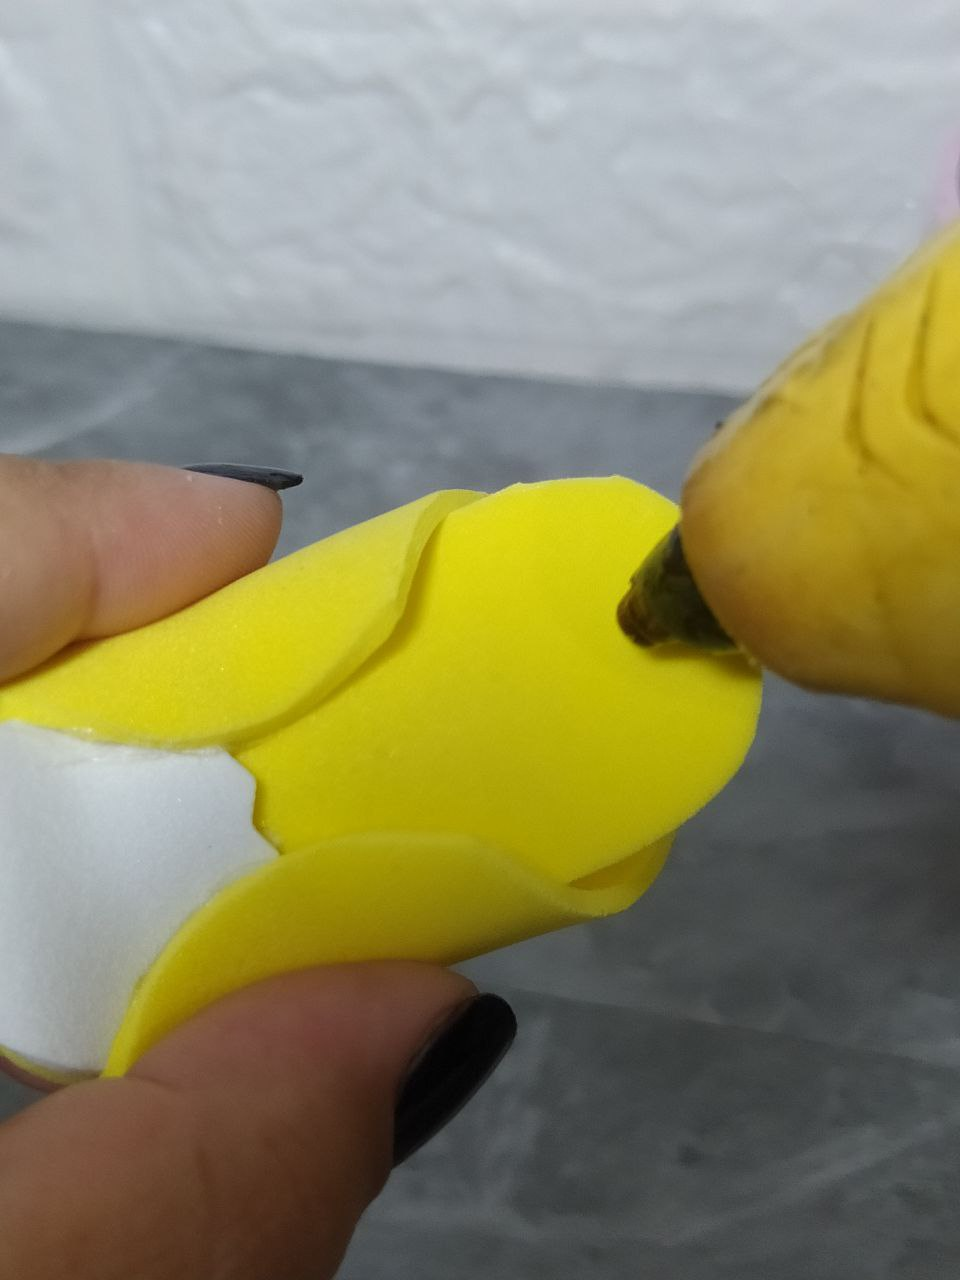
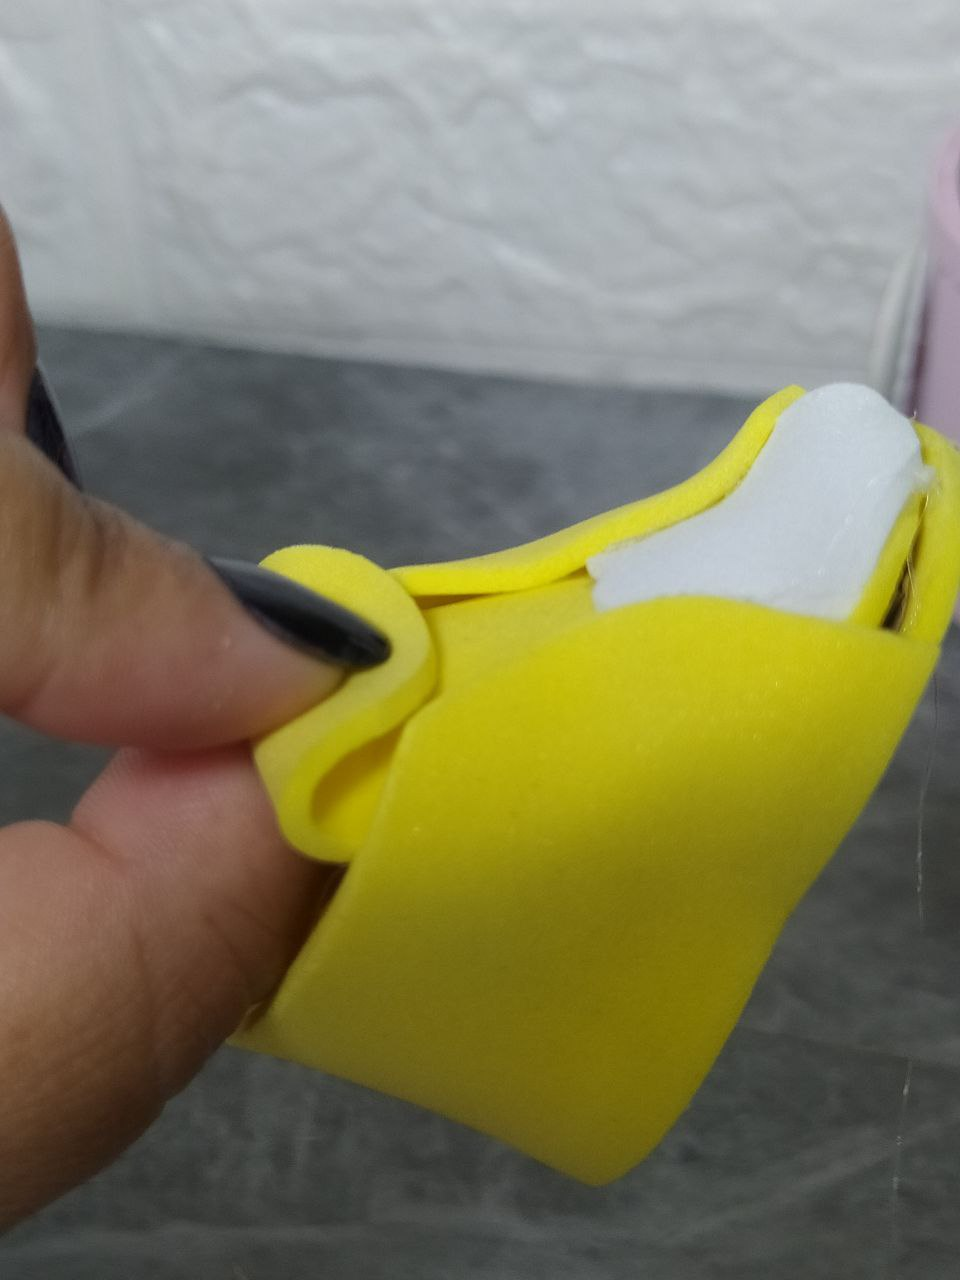
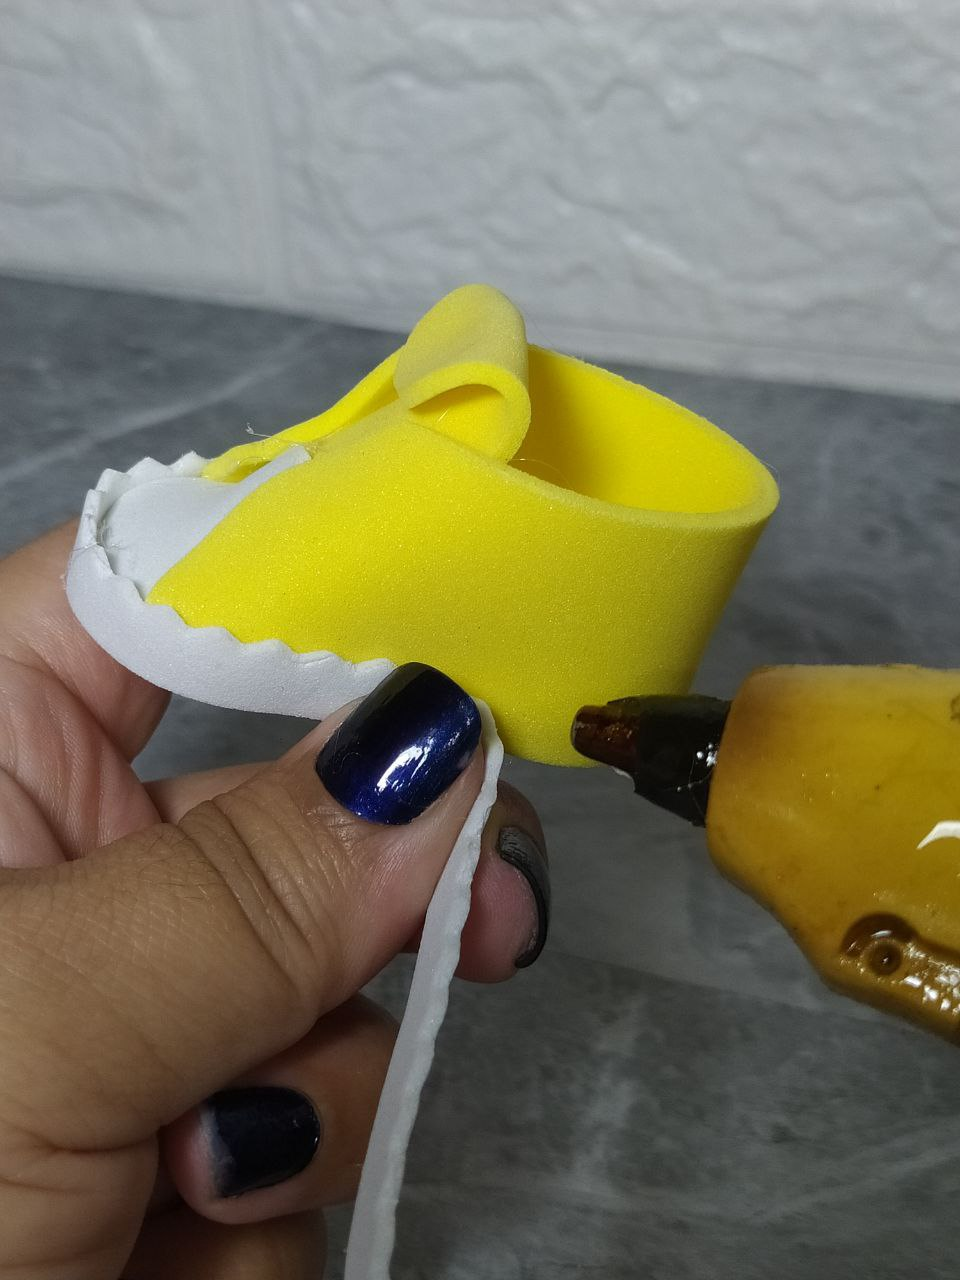
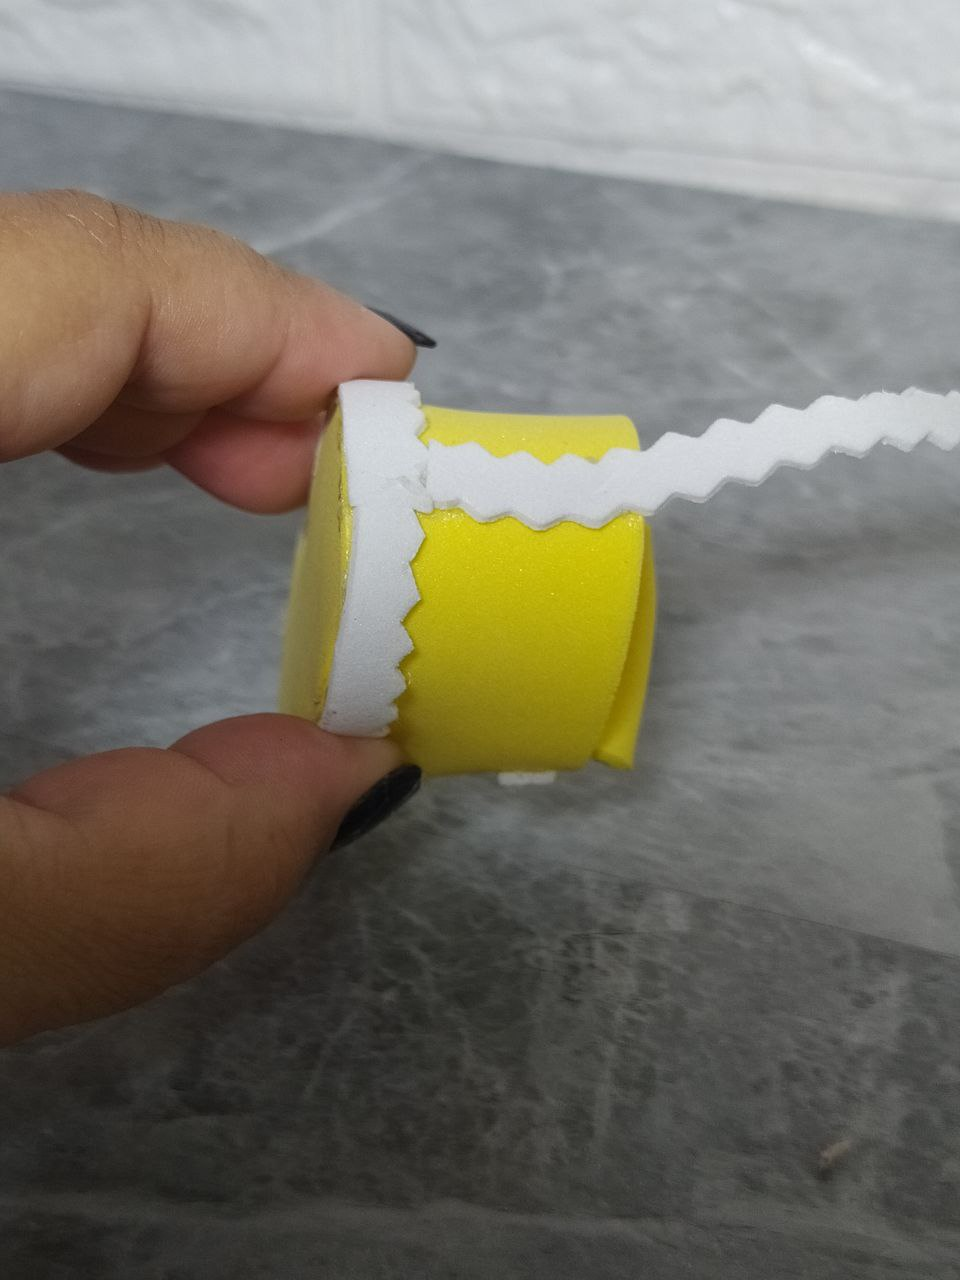
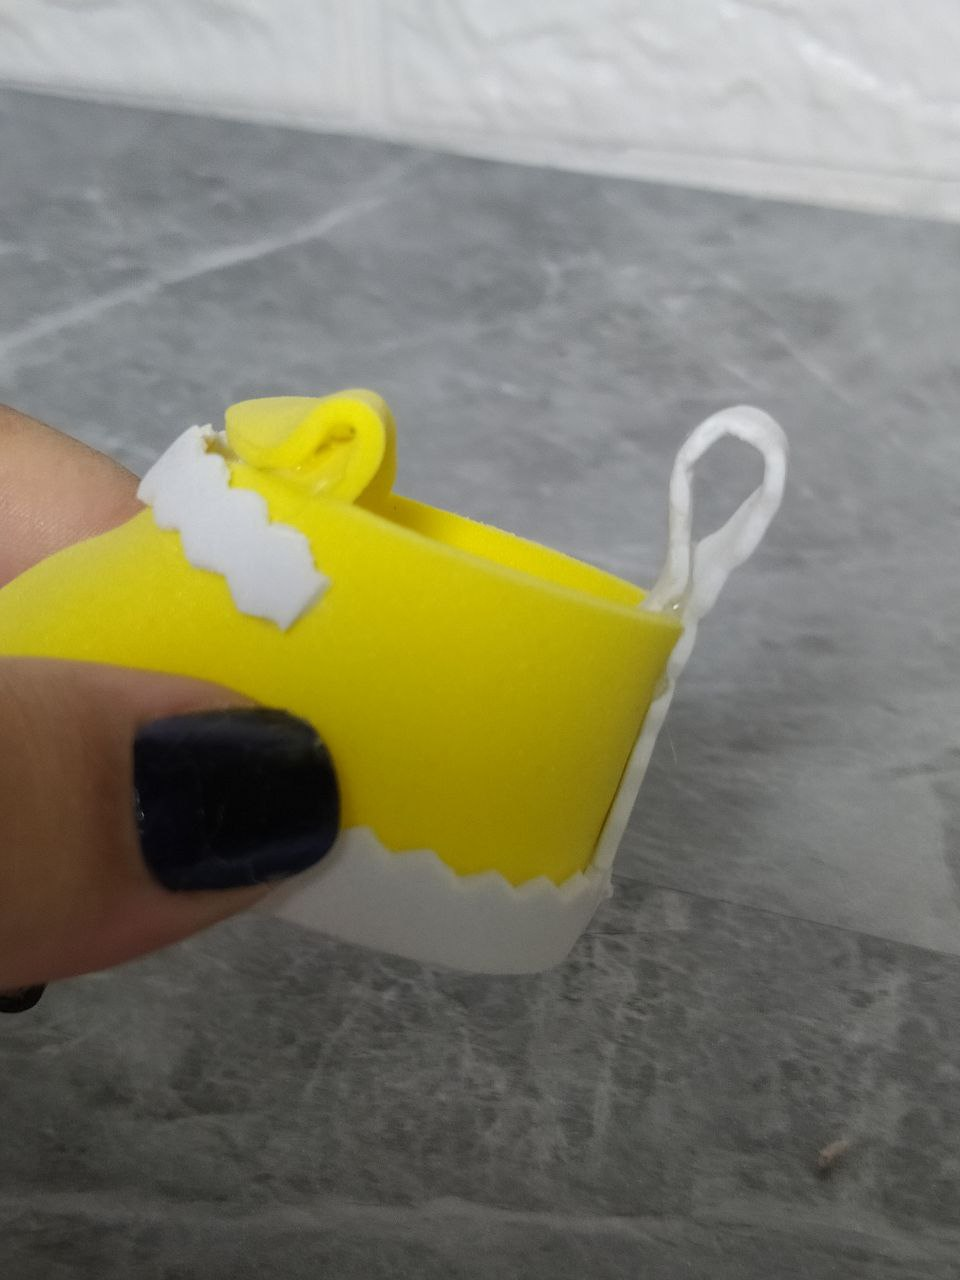
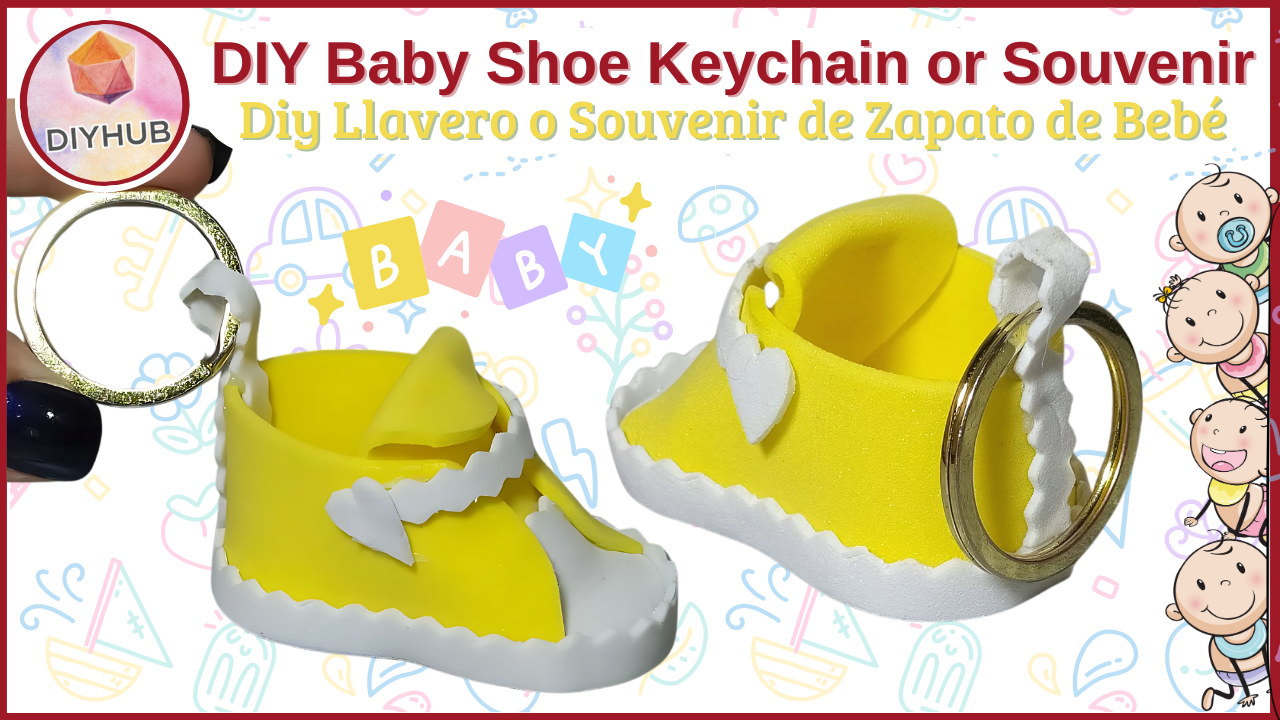
Foam, or EVA foam, is once again the star of a craft with a purpose. This versatile material, which we currently find in such beautiful, tender, eye-catching colors and even textures, has a purpose.

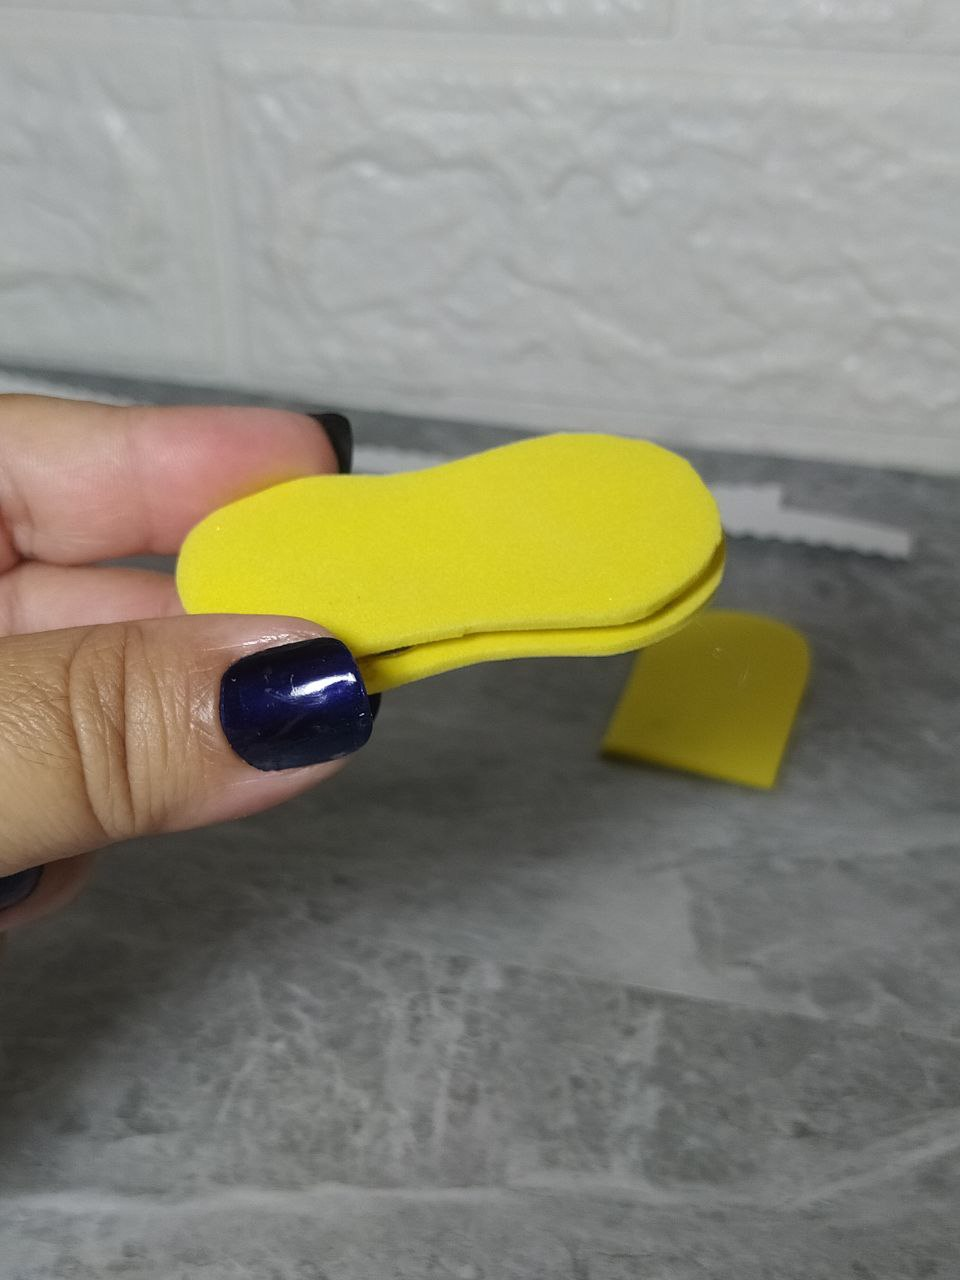
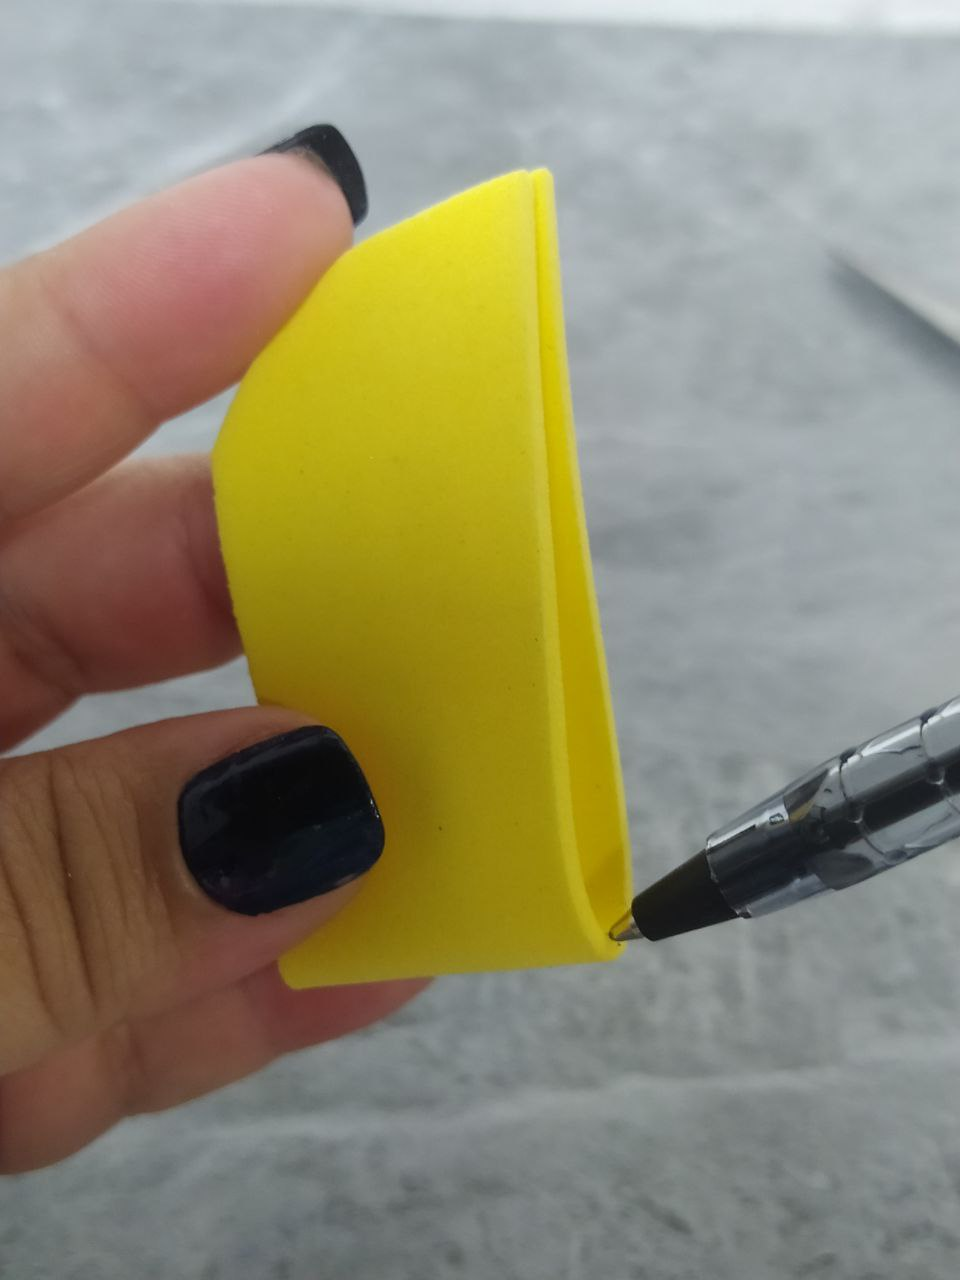
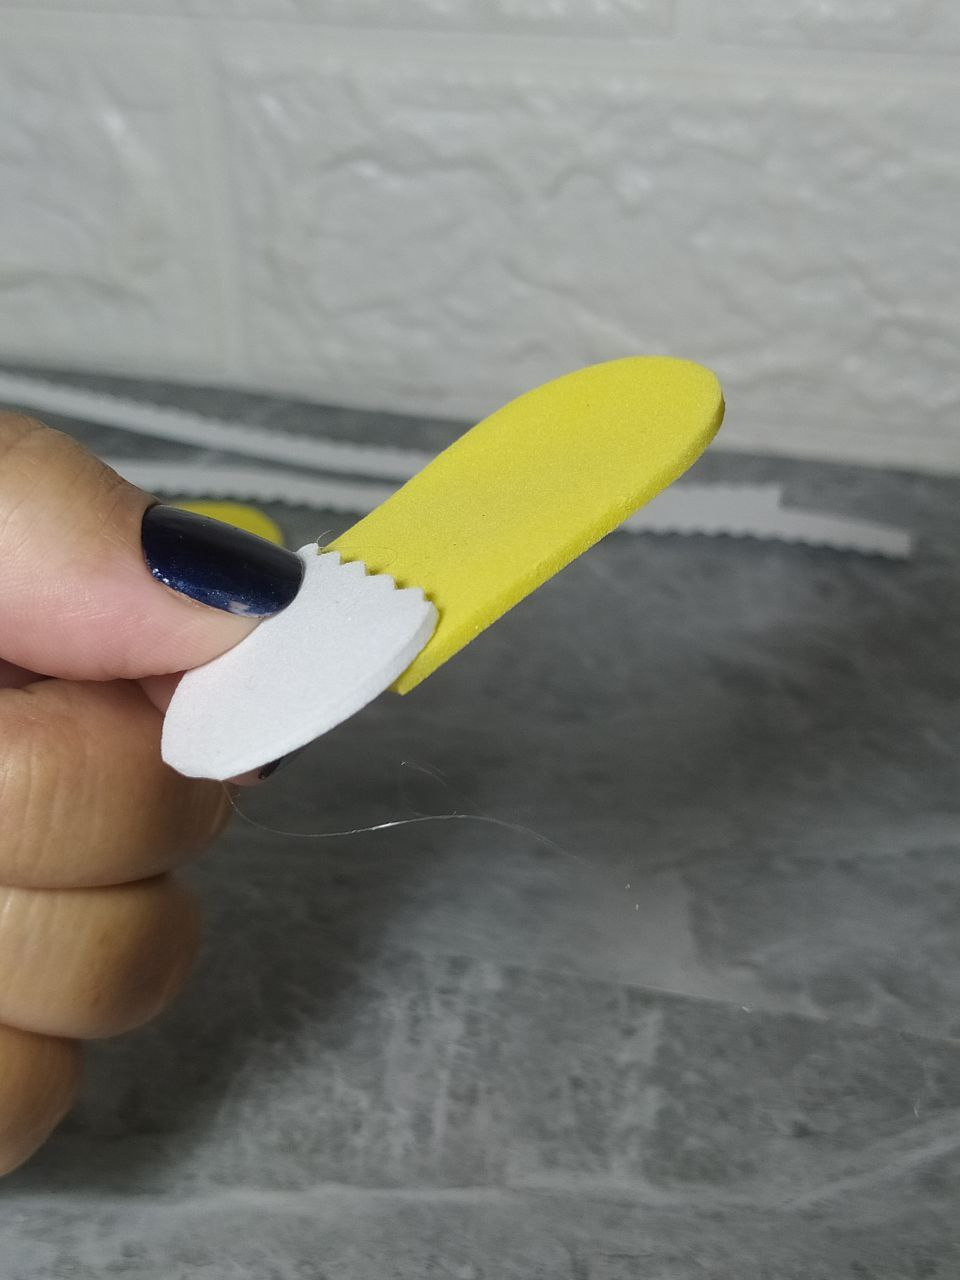
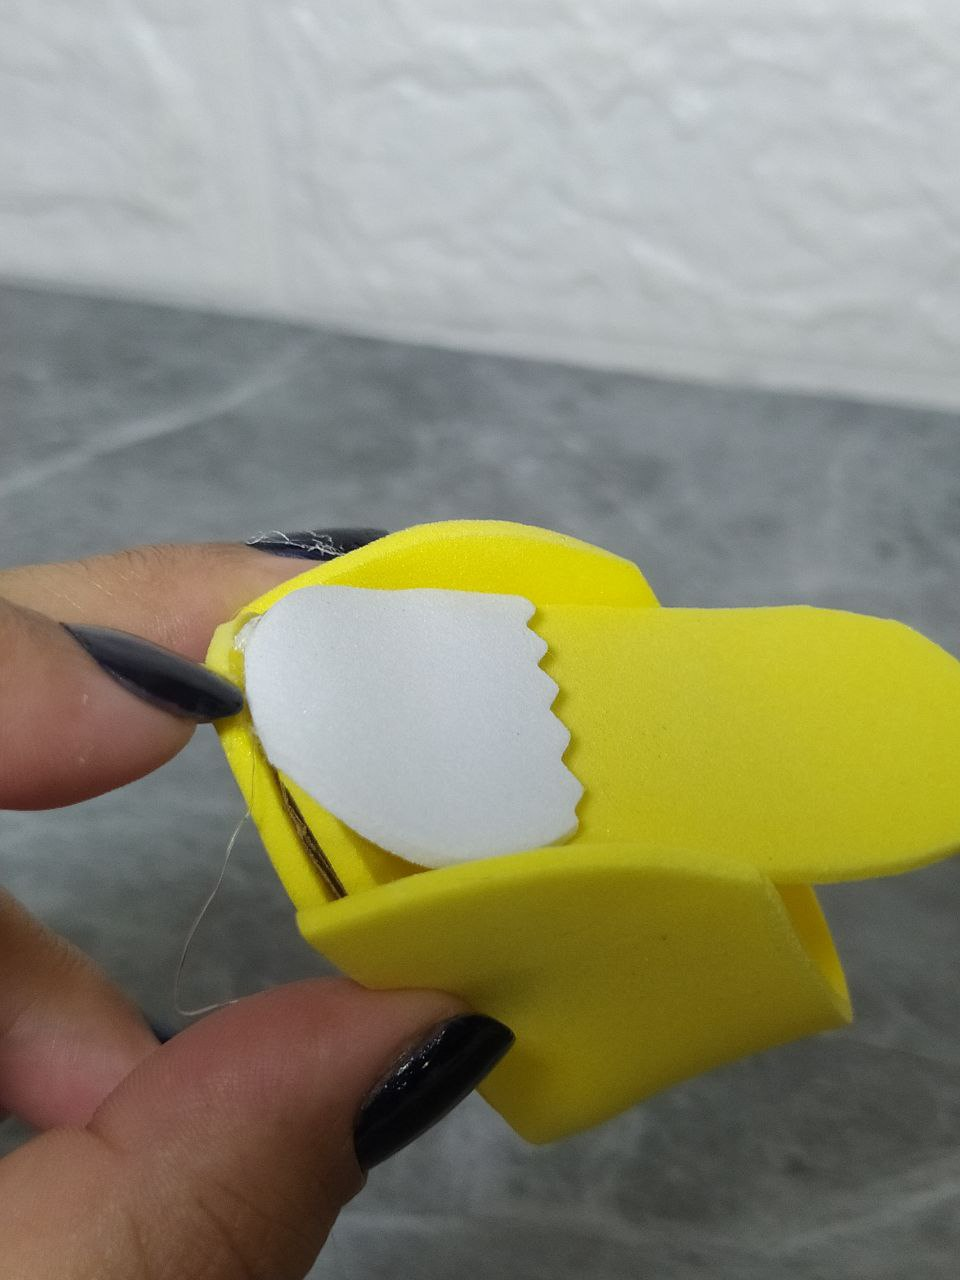
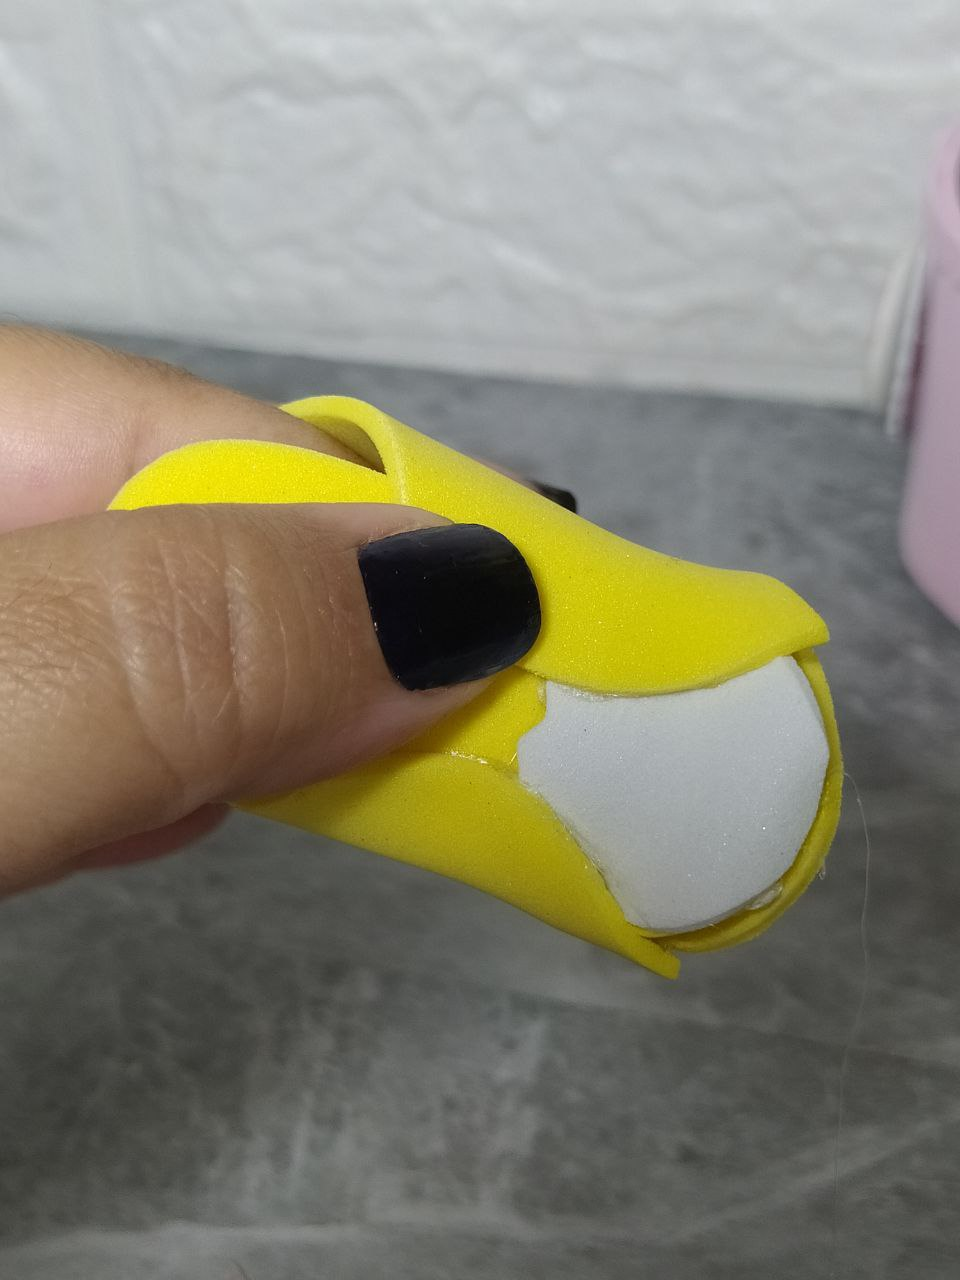
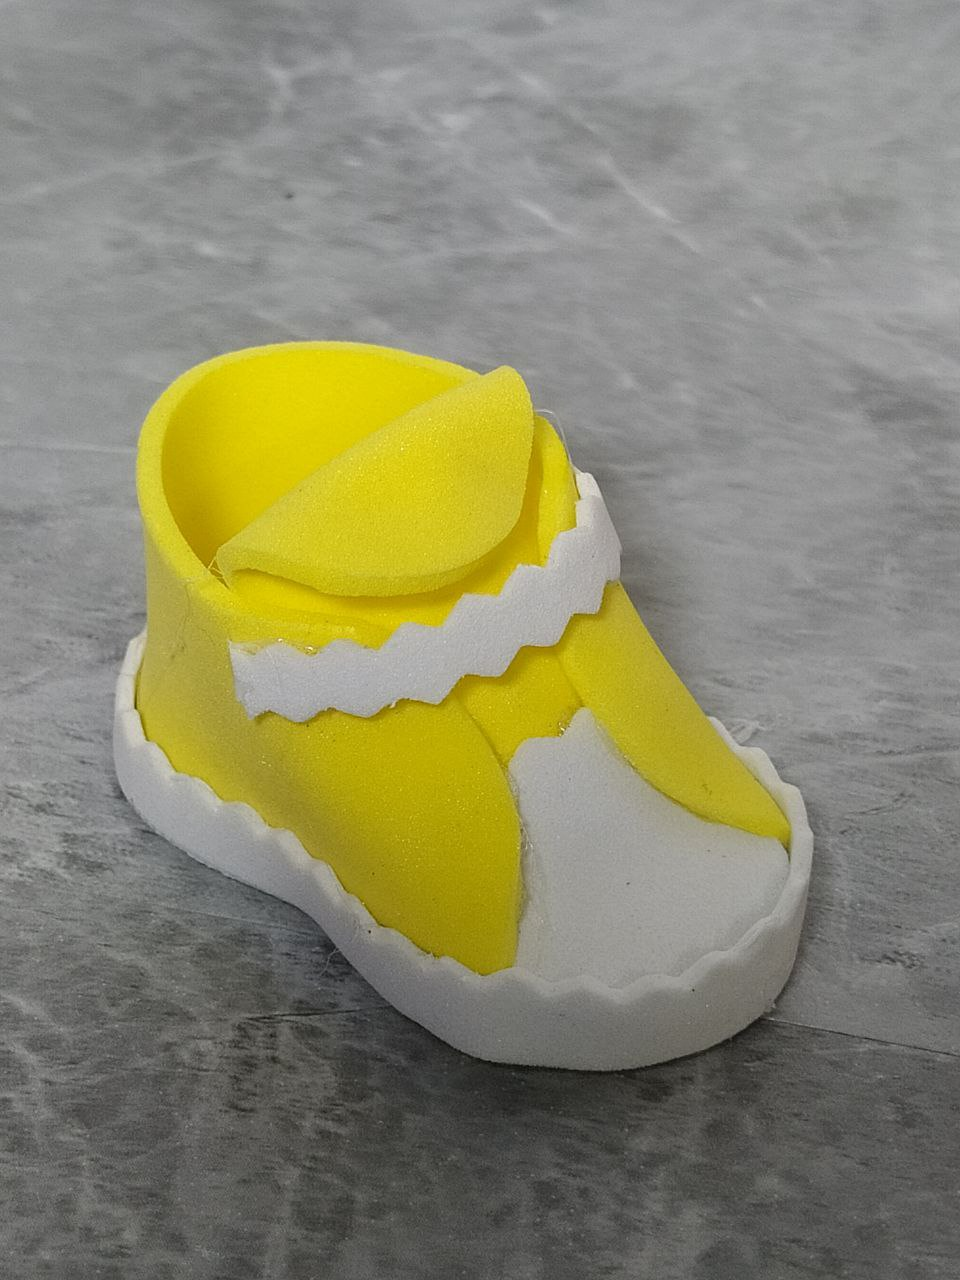
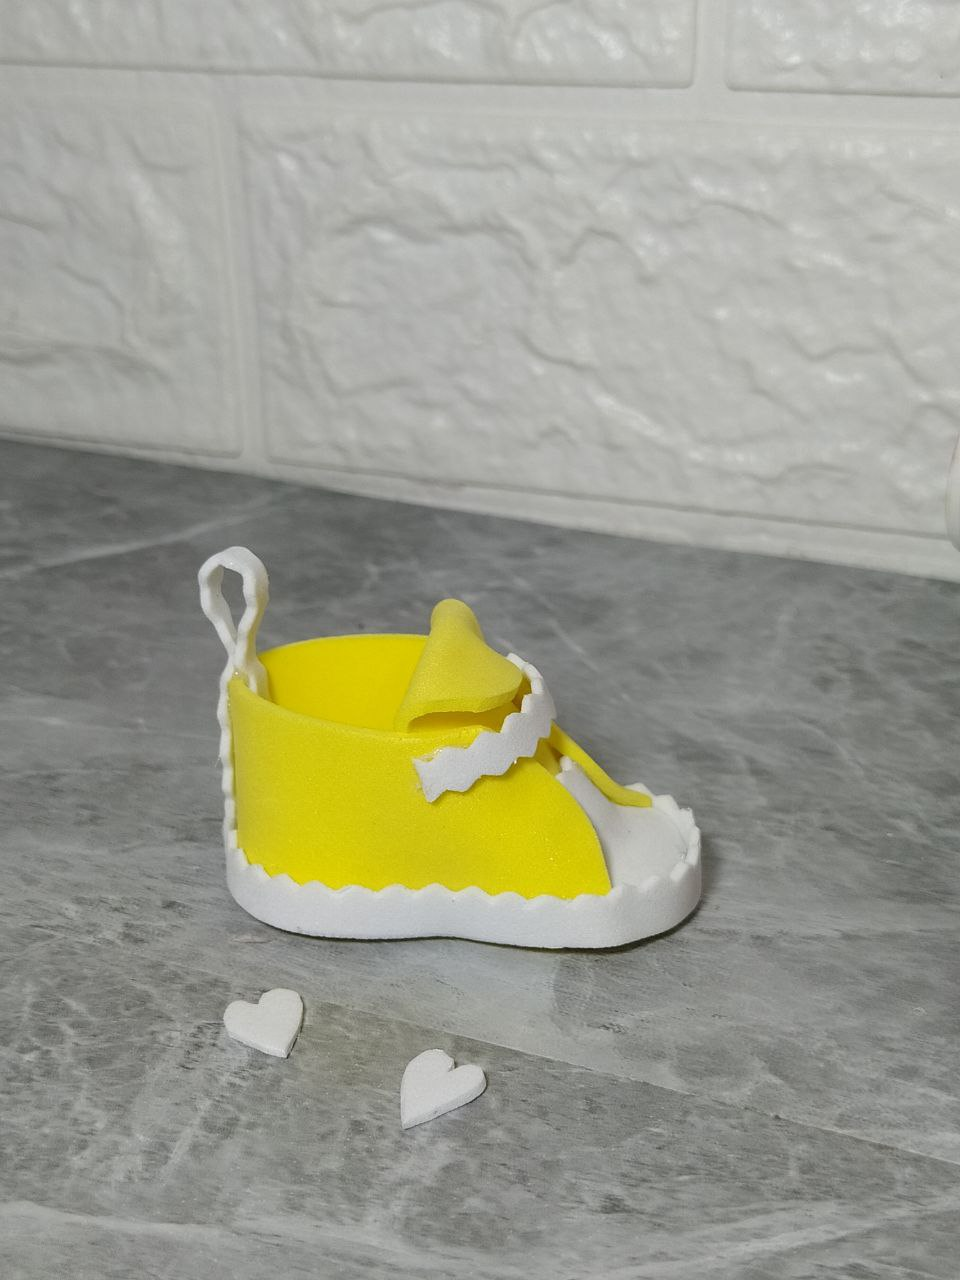
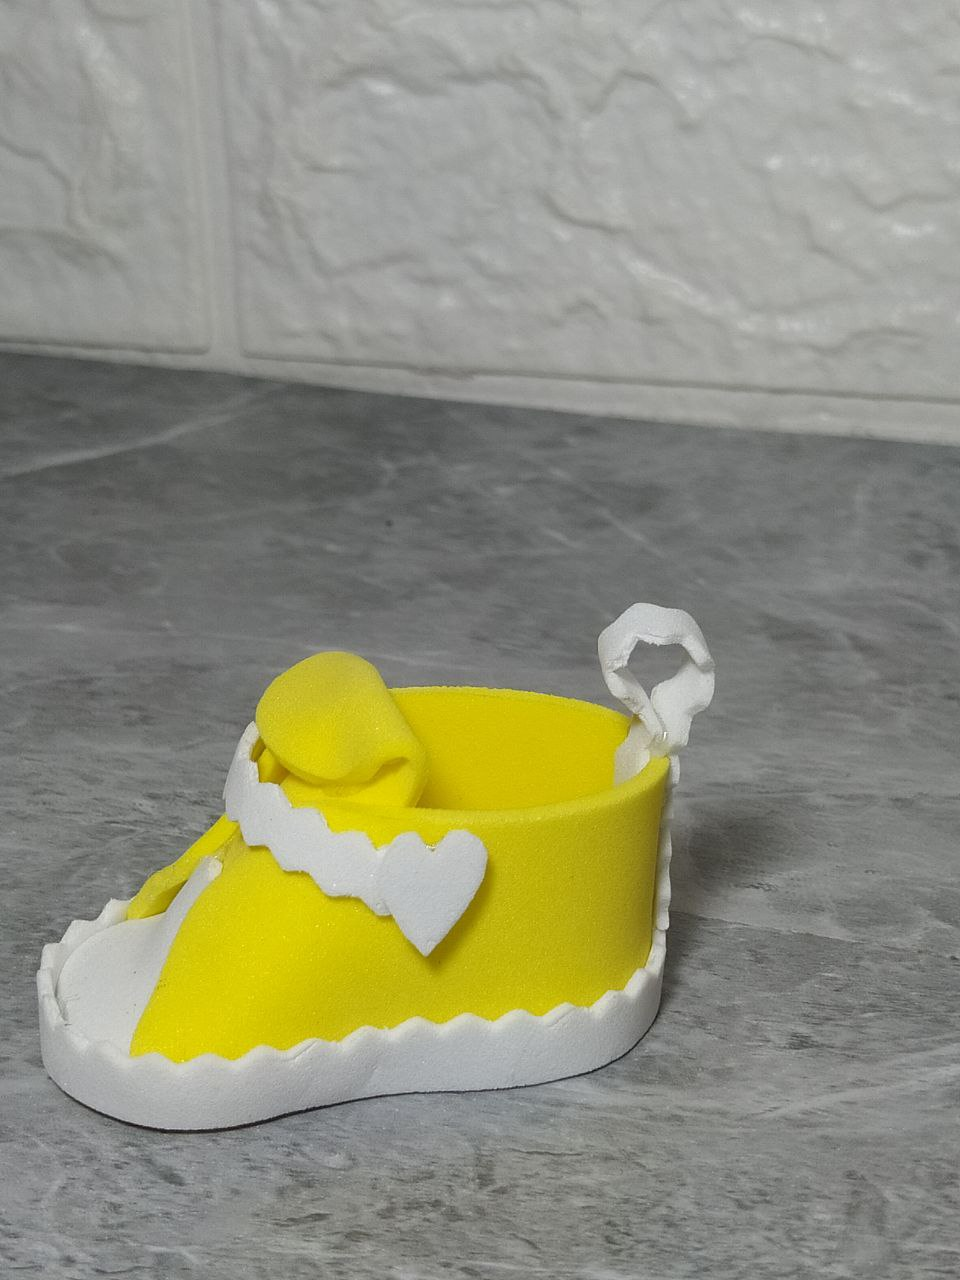
The craft I'm presenting to you has a purpose, as it can be used as a keychain, as a baby shower souvenir, as a table decoration for a children's party, or even hung on the rearview mirror of your car. That's why I'm telling you it has a purpose, and I would say multipurpose. I invite you to watch this tutorial... Welcome.

El foami o goma eva, es nuevamente el protagonista en una Manualidad con propósito. Este material tan versátil que conseguimos actualmente en colores tan bellos, tiernos, llamativos y hasta con texturas.

La Manualidad que les presento les digo que tiene propósito, ya que puede ser un llavero, para obsequiar como souvenir en un baby shower, para decorar la mesa de una fiesta infantil, incluso podrías colgar en el espejo retrovisor del carro, es por ello que les digo que tiene propósito y diría que multipropósito. Te invito a ver este tutorial... Bienvenidos.

Diy Hub Materiales.png

  • Scissors and zigzag scissors.
  • Hot glue gun and glue sticks.
  • Foam in any color.
  • White foam.
  • White sheet and cardboard.
  • Tijera y tijera con corte en zig zag.
  • Pistola de silicón caliente y barras de silicón.
  • Foami de cualquier color.
  • Foami blanco.
  • Hoja blanca y cartón.


image.png image.png

DIY HUB TUTORIAL.png

First, I made the templates for this baby shoe. We can use any lid for this. I used the lid from a glitter jar, but you can also use any other. If you're steady, you can even do it freehand.

Template No. 1 - Two consecutive circles, with a curve connecting them. Template No. 2 - Another circle that continues with part of a 3cm rectangle. Template No. 3 - Another circle, with a section removed using zigzag scissors.

And I start cutting the foam.

Primero realicé las plantillas para este zapato de bebé, y para ello podemos utilizar cualquier tapa, yo utilicé la tapa de un frasquito de escarcha, pero puede ser cualquiera, incluso si tienes buen pulso puedes hacerlo a mano alzada.

Plantilla Nro. 1- Dos círculos consecutivos, con una curva que los conecta. Plantilla Nro. 2- Otro círculo que continúa con parte de un rectángulo de 3cms. Plantilla Nro. 3- Otro círculo al que le quito una parte con la tijera de zig zag.

Y comienzo a cortar en el foami.

image.png image.png image.png image.png

I also cut strips using zigzag scissors from white foam and the pieces using the templates above, like this:

Template No. 1 - Two pieces of yellow foam + One piece of cardboard. Template No. 2 - One piece of yellow foam. Template No. 3 - One piece of white foam.

One strip of yellow foam that I round off at two ends.

Corto también tiras con la tijera de zig zag, en foami blanco y las piezas con las plantillas anteriores así:

Plantilla Nro. 1- Dos piezas en foami amarillo + Una pieza en cartón. Plantilla Nro. 2- Una pieza en foami amarillo. Plantilla Nro. 3- Una pieza en foami blanco.

Una tira en foami amarillo que redondeo en dos de sus extremos.

image.png image.png image.png image.png

The pieces of Template No. 1 are glued together with hot glue, leaving the cardboard in the center and the yellow foam on the top and bottom.

I fold the yellow foam strip to establish the center and glue it to what will be the base of the baby shoe, as shown below:

Las piezas de la Plantilla Nro.1, se pegan con silicón caliente, dejando el cartón en el centro y los foami amarillo en la parte superior e inferior.

La tira de foami amarillo la doblo para establecer el centro, y la pego en lo que será la base del zapato de bebé tal como se ve a continuación:

image.png image.png image.png image.png

This is how the glued strip looks, not completely, as I just left a little bit of space at the ends.

I glue the pieces of Templates 2 and 3 as shown below. They will form the tongue of the baby shoe. I glue it to the front of the shoe base and cover it with the ends of the side strip I glued earlier.

Así luce la tira pegada, no completamente, ya que apenas dejo un poco libre en los extremos.

Las piezas de las Plantillas 2 y 3, las pego como aparece a continuación, ellas formarán la lengüeta del zapato de bebé. Y la pego en la parte frontal de la base del zapato, y la cubro con los extremos de la tira lateral que pegué anteriormente.

image.png image.png image.png image.png

I fold the tongue over with just a dot of hot glue on the top.

I cut the white foam strips with zigzag scissors, glue one all the way around the bottom of what would become the sole, and a small piece to decorate the tongue.

La lengüeta la doblo con apenas un punto de silicón caliente en su parte superior.

Las tiras de foami blanco cortas con la tijera de zig zag, pego una abajo en lo todo alrededor en lo que sería la suela, y un pedacito pequeño para decorar la lengüeta.

image.png image.png image.png image.png

If I'm using this baby shoe as a keychain, it's ideal to glue another strip to the outside of the back and fold it back inward, creating a loop that will hold the key ring.

To complete the decoration, I cut two hearts out of white foam and glued them to each end, as shown in the picture.

Si este zapato de bebé lo utilizo para llavero, es ideal pegar otra tira en la parte externa posterior, y la devuelvo hacia adentro, dejando que se forme una especie de aro que servirá para para colocar el aro con las llaves.

Para complementar la decoración, corté dos corazones en foami blanco y los pegué en cada extremo como se ve en la imagen.

image.png image.png image.png image.png

This baby shoe keychain is ready. I've already added the key ring to hold the keys. It looks great, very cute, and the contrast between the two colors is beautiful.

Now all that's left is to use our creativity to create varied and beautiful combinations that can be used for boys or girls, with colorful foam or prints.

Ya está listo este zapato de bebé para llavero, aquí ya le coloqué el aro para introducir las llaves, se ve genial, muy tierno y el contraste de ambos colores es precioso.

Ya lo que queda es usar nuestra creatividad para hacer combinaciones variadas y preciosas, que puedan usarse para niño o niña, con foami de colores o con estampados.

image.png

I hope you enjoyed this tutorial, this DIY HUB project, which gave me so much satisfaction and looks super cute with this combination.

I cordially invite you to follow my upcoming posts.

Deseo que les haya gustado este tutorial, este proyecto DIY HUB que me dio muchas satisfacciones y es que se ve súper tierno con esta combinación.

Te invito cordialmente a seguir mis próximas publicaciones.


I took the photos with my phone Redmi Note 8 Apps I used: Canva Pro for Cover, Collage and Banners

I used Deepl Translator

My social networks: Discord: YennysYaneth#0189 Twitter: @yennysferm Instagram: @yennysyaneth


Las fotos las tomé con mi teléfono Redmi Note 8
Apps que utilicé: Canva Pro para la Portada, Collage y Banners

Utilicé el Traductor Deepl

Mi redes sociales:
Discord: YennysYaneth#0189
Twitter: @yennysferm
Instagram: @yennysyaneth


Leave DIY HUB with a very easy and tender craft (Eng-Esp) by yennysferm71 to browse Hive Keychain Web3 Blog


DIY HUB with a very easy and tender craft (Eng-Esp) was published on and last updated on 07 May 2025.